Antes de efetuar a instalação, é necessário baixar o drive da impressora. Para isto, clique no link abaixo:
https://cdn.kyostatics.net/dlc/za/driver/all/kxdriver_6_3_1806.-download...
Após o download, descompacte a pasta na área de trabalho (para facilitar a instalação), conforme ilustrado na Figura 01.
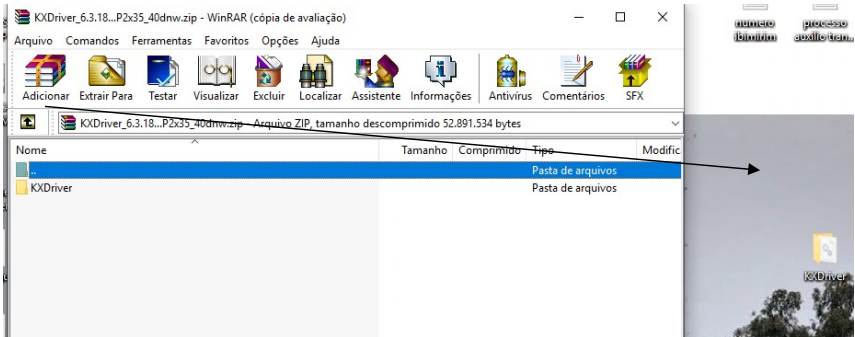
Figura 01
Agora execute os seguintes passos:
Passo 1: Acesse a janela executar, através do atalho do teclado < Windows + R > (mantenha a tecla com o logotipo do Windows, em seu teclado, pressionada, e a seguir pressione a letra “R”).
Uma caixa de diálogo, semelhante à abaixo (Figura 02), será exibida, e é nela que você deverá digitar o NOME DA IMPRESSORA ou o IP DA IMPRESSORA, de acordo com a sala em que você está, conforme descrito na Tabela 01.
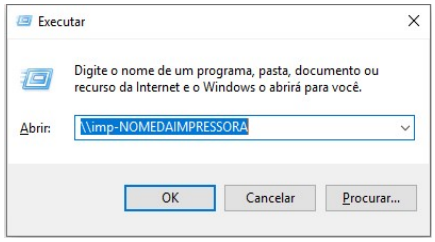
Figura 02
| Sala | Nome da Impressora | IP da Impressora |
|---|---|---|
| Apoio Didático - 2º andar | ApoioDidatico2Andar | 172.28.10.207 |
| 5º Andar | Impressora5Andar | 172.28.70.183 |
| 6º Andar | Impressora6Andar | 172.28.70.63 |
| Coord. de Eng. - 7º andar | eng7andar | 172.28.10.76 |
| COGER - 7º andar | coger7andar | 172.28.10.78 |
Tabela 01
Passo 2: Se o nome estiver correto e você estiver conectado à rede, aparecerá a seguinte janela (Figura 03):
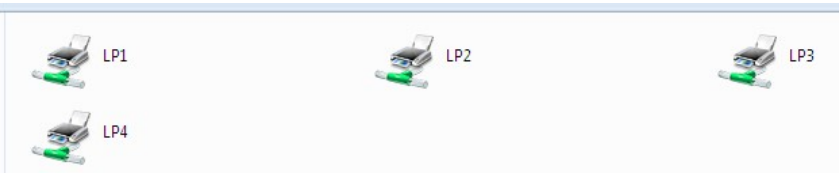
Figura 03
Escolha qualquer um dos itens disponíveis (LP1, LP2...) clicando em cima do mesmo e apertando a tecla < ENTER > no teclado.
Uma janela informando a inexistência do driver específico, irá aparecer, como ilustrado na Figura 04.
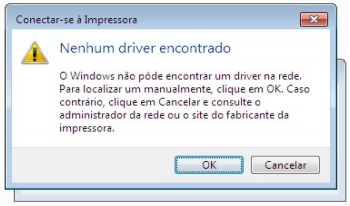
Figura 04
Passo 3: Clique em OK, e então execute a sequência de passos ilustradas pelas imagens abaixo, clicando nos botões destacados em amarelo:
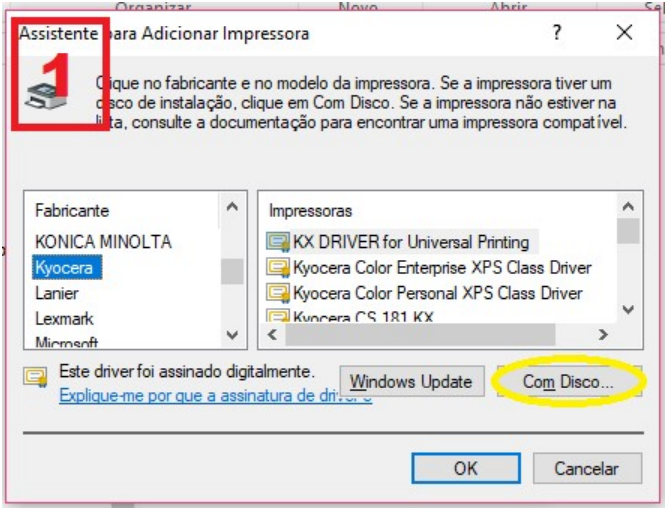
Figura 05
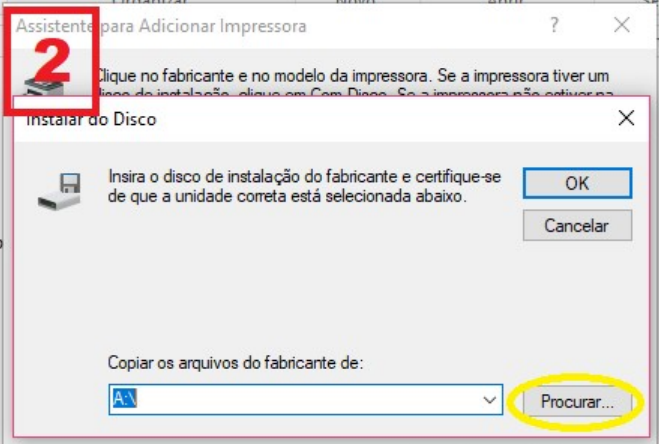
Figura 06
Na Janela 3 será necessário saber exatamente de quantos bits é o sistema operacional instalado em seu computador para poder selecionar a opção correta, para tanto pressione as teclas <Windows + Pause Break> ou clique com o botão direito em cima do ícone meu computador e escolha a opção propriedades, onde será então exibida a janela abaixo (Figura 07):
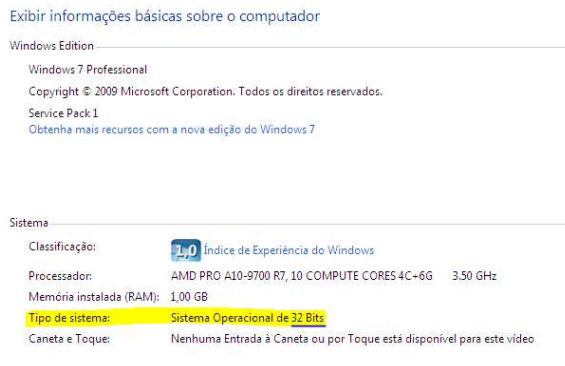
Figura 07
Selecione então a pasta correspondente aos bits do seu sistema operacional (Figura 08)
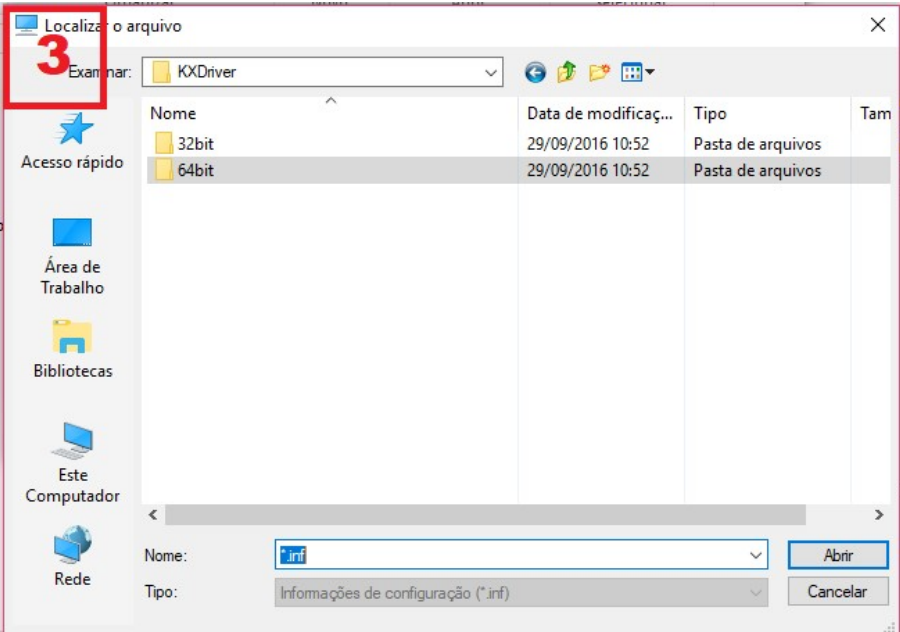
Figura 08
Passo 4: De acordo com esta informação clique na pasta correspondente ao seu sistema, depois entre na pasta “XP and newer” e dê dois cliques no arquivo “OEMSETUP”, após isso, siga a numeração (Figura 09).
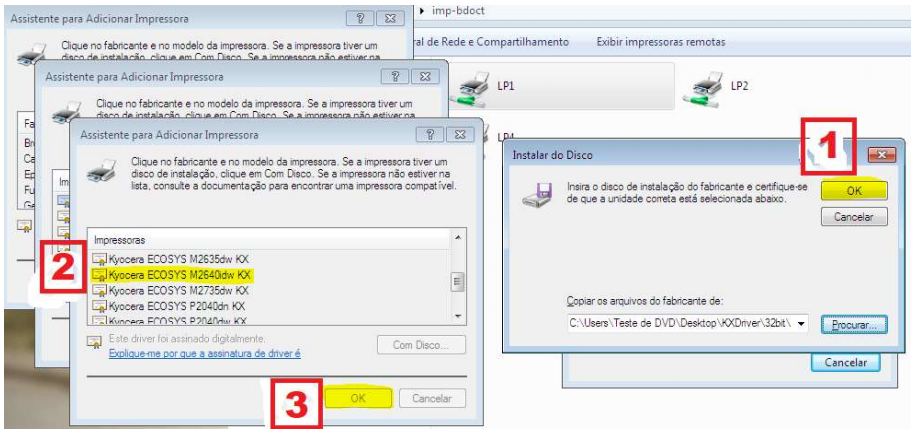
Figura 09
Aguarde um instante, quando a janela abaixo aparecer (Figura 10) sua impressora já estará pronta para uso!
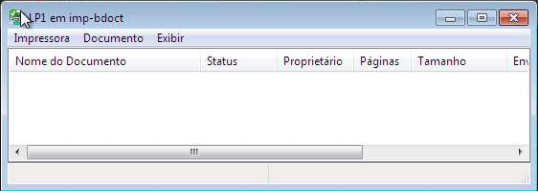
Figura 10
jordan Sneakers | nike shox r4 men wide sneakers for women clearance